
Embarking on your photography journey can feel overwhelming with countless options available. This guide explores the best online photography courses designed specifically for complete beginners, helping you navigate camera basics, composition techniques, and practical skills from the comfort of your home. Discover structured learning paths that transform novices into confident photographers through expert-led instruction and hands-on projects.
Understanding Your First Camera
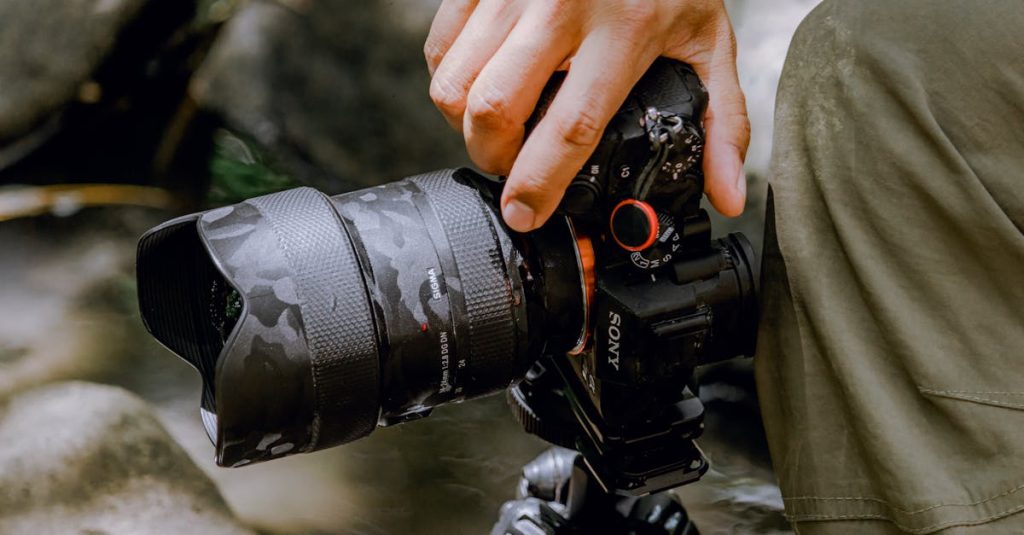
Your camera is your primary tool, and understanding its basic form and function is the first practical step on your photographic journey. For beginners, the landscape is dominated by three key types: DSLRs, mirrorless cameras, and smartphones. Each has distinct advantages. A DSLR uses a mirror mechanism to reflect light into an optical viewfinder, offering a direct, through-the-lens view and a vast selection of affordable used lenses. A mirrorless camera, as the name implies, removes this mirror, making the body smaller and lighter; it uses an electronic viewfinder that shows a digital preview of your image. Your smartphone is a sophisticated, always-available computer with a lens, leveraging computational photography to automate complex processes.
Regardless of type, all cameras share core components. The lens gathers light, and its focal length (e.g., 18mm wide-angle, 50mm standard, 200mm telephoto) determines your field of view. The light then hits the image sensor, a digital chip that replaces film; its size significantly impacts image quality, with larger sensors generally performing better in low light. Your basic controls will include a mode dial (often set to ‘Auto’ or ‘P’ initially), a shutter button, and likely a control wheel to adjust settings.
Choosing your equipment hinges on budget and ambition. A modern smartphone is a powerful starting point that teaches composition and light observation without any extra cost. For those wanting more creative control, a used entry-level DSLR or mirrorless camera with a kit lens (often an 18-55mm) offers tremendous value and a hands-on learning platform. The key is to start with what you have. Use your smartphone to study light and framing daily. If you have an interchangeable-lens camera, begin by learning its physical layout: locate the mode dial, find the menu for image quality settings (shoot in RAW+JPEG if possible), and practice attaching and detaching the lens safely. Familiarity with your specific tool is the essential foundation before diving into the technical artistry of exposure, which we will explore next.
Mastering Exposure Fundamentals
Now that you’re familiar with your camera, it’s time to unlock its true potential by mastering the exposure triangle. This is the fundamental concept of photography, describing how three settings—aperture, shutter speed, and ISO—work in concert to control the light hitting your sensor and shape your final image.
Think of it as filling a glass with water. Aperture is the size of the tap. A wide aperture (like f/2.8) is a wide-open tap, letting in a lot of light quickly and creating a shallow depth of field (blurry background). A narrow aperture (like f/16) is a trickle, letting in less light but yielding a deep depth of field where more of the scene is in focus. Shutter speed is how long you open the tap. A fast speed (like 1/1000s) freezes motion, while a slow speed (like 1/30s) creates motion blur. ISO is your sensitivity to that light. A low ISO (100) needs more light but gives a clean image. A high ISO (3200) lets you shoot in dim light but introduces digital grain, or noise.
The key is balance. If you want a blurry background (wide aperture), you let in more light, so you must compensate with a faster shutter speed or lower ISO to avoid overexposure. To practice, set your camera to Aperture Priority mode (A or Av). Take a photo of a subject at f/4, then at f/11. Notice how the background changes. Next, try Shutter Priority (S or Tv). Photograph moving water at 1/500s, then at 1/4s. See the dramatic difference?
Common problems stem from imbalance. An overexposed, washed-out image means too much light; fix it by narrowing the aperture, speeding up the shutter, or lowering the ISO. An underexposed, dark image needs the opposite: widen the aperture, slow the shutter, or raise the ISO. Mastering this balance gives you creative control, moving you from taking snapshots to making photographs. With these tools, you’re ready to compose your shots with intention, which we’ll explore next.
Essential Composition Techniques
Now that you can reliably control exposure, the next step is to arrange the elements within your frame. Composition is the art of guiding the viewer’s eye and creating a sense of order and impact. It transforms a simple snapshot into a compelling photograph.
The rule of thirds is your foundational tool. Imagine your frame divided by two horizontal and two vertical lines. Placing key elements at the intersections of these lines creates balance and interest. For a portrait, position the subject’s eyes on a top intersection. In a landscape, place the horizon on the top or bottom line, not dead center.
Leading lines use natural or man-made lines—a winding path, a row of streetlights, a river—to draw attention directly to your main subject. They create depth and a clear visual journey. Framing involves using elements within the scene, like a window arch or overhanging branches, to encircle your subject, focusing attention and adding context.
While symmetry can be powerfully pleasing, often used in architectural or reflection photography, don’t underestimate negative space. This is the intentional use of empty areas, like a vast sky or a plain wall, to isolate your subject, evoke emotion, and create a minimalist, powerful statement.
Practice these techniques today:
- Take your camera or phone and only shoot using the rule of thirds grid. Turn on the gridlines in your display settings.
- Find and photograph three different types of leading lines in your neighborhood.
- Create a portrait using natural framing found in your home, like a doorway.
- Make a photo where your subject is small, surrounded by expansive negative space.
Mastering these compositional rules gives you the vocabulary to build visually engaging images, setting the stage for understanding how light, our next topic, interacts with these carefully arranged elements.
Lighting Basics for Beginners
Now that you’ve begun arranging elements within your frame, it’s time to understand the very thing that makes photography possible: light. Mastering light is the single greatest leap you can make in improving your photos. Light defines form, creates mood, and adds depth, transforming a flat composition into a compelling image.
Begin by observing natural light. The golden hour—the period shortly after sunrise and before sunset—provides soft, warm, directional light that adds dimension and a magical quality to portraits and landscapes. Conversely, the harsh midday sun creates strong shadows and high contrast, which can be challenging. Seek diffused light on overcast days or in open shade; this soft, even illumination is incredibly flattering, eliminating harsh shadows and revealing subtle details and colors. Backlighting, where the light source is behind your subject, can create stunning silhouettes or, with careful exposure, a beautiful, glowing rim of light that separates your subject from the background.
Don’t fear artificial light. Start simple with a single lamp or a speedlight flash bounced off a white ceiling or wall. This mimics diffused light, softening harsh shadows. The classic three-point lighting setup (key light, fill light, back light) is a foundational concept. As a beginner, practice with a single light source and a simple reflector, like a white poster board, to fill in shadows. This teaches you how direction and quality of light affect mood: side light emphasizes texture and drama, while front light is flat and even.
Your first tool for modifying light is observation. Watch how light falls throughout the day. Use windows as giant softboxes. A sheer white curtain can diffuse harsh sunlight. A piece of white cardboard becomes a reflector, and a black one can deepen shadows for added drama. Remember, light is your paintbrush; learn its characteristics—hard or soft, warm or cool, direct or diffused—and you gain the power to consciously shape the emotion and impact of every photograph you take, setting the stage for the final creative step: post-processing.
Introduction to Photo Editing
Now that you’ve captured your images, understanding light’s role in composition and mood, the next transformative step happens at the computer. Photo editing is not about fixing “bad” photos, but about refining and realizing the vision you had when you pressed the shutter. It’s the digital equivalent of a darkroom, where you enhance contrast, correct colors, and guide the viewer’s eye, turning a good capture into a compelling photograph.
Your first decision is choosing software. For beginners, free options are powerful starting points. GIMP is a highly capable, open-source editor with tools rivaling paid programs, though its interface can be complex. Darktable and RawTherapee are excellent for raw file processing. Many cameras also include basic proprietary software. For paid software, Adobe Lightroom is the industry standard for organization and non-destructive editing, often bundled with Photoshop in the Photography Plan. Skylum Luminar Neo offers a simpler, AI-powered approach, while Capture One provides exceptional color science and tethering.
Before diving in, adopt a crucial best practice: non-destructive editing. This means your edits are stored as instructions, leaving the original file untouched. Use adjustment layers, virtual copies, or software like Lightroom that works this way by default. Your foundational workflow should follow a logical sequence:
- Global Adjustments: Start with the whole image. Crop for better composition, straighten horizons, and correct lens distortion.
- Exposure & Tone: Adjust exposure, contrast, highlights, and shadows to achieve a balanced range of light, ensuring details aren’t lost in pure black or white.
- Color Correction: Adjust white balance to remove unwanted color casts, then fine-tune saturation and vibrance for natural-looking hues.
- Local Adjustments & Retouching: Finally, use brushes or gradients to dodge (lighten) or burn (darken) specific areas, and employ spot removal to clean up sensor dust or minor distractions.
Mastering these core techniques will give you immense creative control, preparing you to evaluate the structured learning paths offered by major online platforms, which we will explore next.
Top Online Learning Platforms
Having grasped the fundamentals of photo editing, the next critical step is choosing where to learn. The digital landscape offers several major platforms, each with a distinct philosophy for teaching photography. Your choice will significantly shape your learning experience, making it vital to understand their nuances.
Skillshare champions a creative, project-based approach. Its courses are often shorter, highly visual, and led by practicing artists. The platform thrives on its community, with active project galleries where you can share your work and receive peer feedback. This makes it ideal for learners who are motivated by doing and inspired by seeing others’ interpretations. Its subscription model grants unlimited access, perfect for those who like to explore diverse styles.
In contrast, Coursera and LinkedIn Learning offer a more formal, academic, and professional structure. Coursera partners with top universities, providing rigorous, syllabus-driven courses that often include graded assignments and lead to certificates. LinkedIn Learning, integrated with the professional network, focuses on career-oriented skills with courses that are concise and software-specific. Both use a mix of subscription and per-course pricing, appealing to learners seeking credentials or structured, textbook-like progression.
Udemy operates as a vast marketplace with a “for everyone” approach. Its strength lies in its enormous breadth and depth; you can find highly specific, beginner-to-profound courses on any photography niche, often at deeply discounted prices. Once purchased, you own the course for life. However, quality varies, so relying on ratings and reviews is essential. It suits self-directed learners who know exactly what they want to master and prefer a one-time payment.
Your selection hinges on your learning style. Choose Skillshare for community and creativity, Coursera/LinkedIn for academic structure and credentials, and Udemy for specific, permanent, and affordable topic mastery. This decision lays the foundation for the structured learning path we will explore next, where consistent practice and project-based growth take center stage.
Structured Learning Paths for Beginners
Having chosen your ideal platform, the next critical step is establishing a structured learning path. A haphazard approach leads to frustration, but a clear progression builds confidence and competence. Your journey should begin with absolute fundamentals: understanding exposure through the interplay of aperture, shutter speed, and ISO. Master your camera’s manual mode before anything else; this is non-negotiable. A quality beginner course will enforce this, ensuring you move from auto to full creative control.
From there, a logical path unfolds. Progress to composition—learning the rule of thirds, leading lines, and framing—then to mastering focus techniques and the qualities of light. Only after solidifying these core skills should you delve into specific genres like portraiture or landscape. This sequential mastery prevents overwhelm. Crucially, your learning must be project-based. Theory alone is useless. Assign yourself weekly shoots with specific goals, like “capture motion blur” or “create five different portraits using window light.” This applied practice cements knowledge.
Consistent, deliberate practice is your greatest tool. Shoot regularly, even if it’s just in your home. More importantly, seek constructive feedback. Use platform community forums or share work with peers to gain objective insights you cannot see yourself. As you complete projects, begin curating your best work into a simple portfolio. Start a dedicated folder or a basic website. Your portfolio is not static; it’s a living document of your growth. Review it monthly to track your evolving eye and technical skill, removing older shots as your standards rise. This cycle of learn, practice, create, and critique forms the essential rhythm for transforming from a novice into a skilled photographer, perfectly setting the stage for the hands-on projects we will explore next.
Practical Photography Projects
Now that you have a structured learning path, it’s time to put theory into practice. This chapter is dedicated to hands-on projects that transform abstract concepts into tangible skills. These assignments are designed to build upon the foundational knowledge from your course, pushing you to explore your camera deliberately and see the world with a photographer’s eye. The goal is not perfection, but progressive confidence and the early development of your personal style.
Begin with a Still Life: The Master of Control project. Arrange three simple household objects on a table near a window. Your objective is to master manual exposure and depth of field. Shoot the same composition three ways: with a wide aperture (like f/2.8) for a blurry background, a narrow aperture (like f/16) to keep everything sharp, and by adjusting only the shutter speed to create a bright and a dark version. Self-assess: Are your focus points sharp? Did you control the exposure as intended?
Next, try a Portrait: Window Light Character Study. Photograph a willing subject using only natural light from a window. Focus on their eyes and experiment with their positioning relative to the light—facing it, turned at 45 degrees, and with their back to it (using the light as a rim light). Your objective is to understand how light shapes a face and conveys mood. Assess your shots: Does the lighting flatter the subject? Is the emotion clear?
For a Landscape: The Golden Hour Exploration, visit a local park or your backyard during the hour after sunrise or before sunset. Your goal is to practice composition using the rule of thirds and leading lines. Find a foreground element (a rock, a flower) to create depth. Take a series of shots, changing your vantage point each time—low to the ground, from a higher point, moving left or right. Review: Which composition feels most balanced and immersive?
Finally, embark on a Street Photography: Color or Shape Hunt. In a safe public space, give yourself a single visual theme for 30 minutes: photograph only the color red, or seek out strong geometric shapes like circles and triangles. This project trains your observational skills and simplifies the chaotic environment. Objective: Create a cohesive mini-series. Assess: Do your images work together as a set? Did you capture candid moments without intrusion?
Completing these genre-specific projects reinforces technical lessons in a focused context. As you review your work, you’ll start to notice preferences—perhaps you’re drawn to dramatic shadows or clean compositions. This self-awareness is the seed of your unique photographic voice, giving you the confidence to move forward and engage with the broader photography community.
Building Your Photography Community
Having completed several practical projects, you might now be wondering, what’s next? The solitary practice of photography is essential, but the journey truly accelerates when you connect with others. Building a photography community transforms learning from a private study into a dynamic, supportive dialogue that fuels growth and motivation.
Start by immersing yourself in dedicated online spaces. Photography forums like DPReview or FredMiranda offer deep technical discussions, while Facebook and Reddit groups provide genre-specific camaraderie. Don’t just lurk; participate. Share a project you’re proud of from the previous chapter’s exercises and ask specific questions. More impactful are dedicated critique communities, such as those within courses like The Photography Institute or on platforms like Gurushots, where the sole purpose is constructive peer review. Learning to give useful feedback—commenting on composition, light, and story rather than just saying “nice shot”—sharpens your own critical eye. When receiving feedback, detach your ego; seek to understand the viewer’s perspective, not to defend your work.
Actively look for mentors, even informal ones. Follow photographers whose style you admire on Instagram or YouTube, engage thoughtfully with their content, and don’t be afraid to ask a thoughtful question. Many experienced photographers enjoy helping newcomers. Similarly, collaborate with fellow beginners you meet online. Plan a virtual photo walk where you both shoot the same theme (like “shadows” or “blue”) and then compare results. This shared purpose is a powerful antidote to creative blocks.
When motivation wanes, which it inevitably will, this community becomes your safety net. Sharing your struggles often reveals that every photographer faces them. A local photography club’s monthly challenge or an online group’s themed contest can provide the external nudge you need. Remember, the feedback and friendships you cultivate turn the technical craft you’ve been learning into a connected, living art. Your next project will be richer for it.