
Navigating the world of camera lenses can be overwhelming and expensive, but photography subreddits hold valuable secrets that experienced photographers use to make smart purchases. This guide reveals how to choose the perfect lens for your needs without overspending, covering everything from understanding focal lengths to finding hidden deals in the used market.
Understanding Your Photography Needs First
Before you even glance at a spec sheet or a price tag, the most critical step is a deep, honest look at your own photography. The secret isn’t in finding the “best” lens, but the best lens for you. This self-assessment is the ultimate budget-saving tool, preventing expensive purchases that gather dust because they don’t align with what you actually create.
Start by analyzing your existing photos. Use your metadata or simply sort your library. What do you shoot most? Are you drawn to intimate street scenes, vast landscapes, or detailed wildlife? Your dominant subjects dictate your primary focal length needs. A lens perfect for sweeping astrophotography will fail for tight headshots. Be brutally honest: are those stunning bird photos you aspire to take, or are you truly a people photographer at heart? Prioritize the needs of your current, active style over aspirational wants.
Conduct a practical exercise with your current kit lens. Spend a week shooting, but fix your zoom at one focal length for an entire session. Shoot at 35mm, then 50mm, then 70mm. Notice which focal length feels most natural and which scenes you struggled to capture. This hands-on test reveals your visual preference and highlights the gaps in your gear. You might discover you live at the wide end, craving something even wider, or that you’re constantly zooming in, signaling a need for a telephoto.
Finally, translate this analysis into a concrete photography goals list. Write down: “I need to shoot my kids’ indoor sports in low light,” or “I want to create sharper portraits with blurred backgrounds.” These goal statements directly point to required specifications—like a fast aperture or a specific focal length—which will become your essential shopping filters. This focused list is your shield against marketing hype and peer pressure, ensuring your next lens purchase is a purposeful step forward in your photographic journey, not a costly detour.
Decoding Lens Specifications Like a Pro
Now that you’ve identified your needs, the next step is deciphering the alphabet soup on a lens’s label. Understanding these specifications is crucial to making a smart purchase that matches your goals without paying for features you don’t need.
The focal length, measured in millimeters (mm), is your lens’s fundamental character. It dictates your angle of view. A lower number like 24mm is a wide-angle, perfect for landscapes or tight interiors. Around 50mm is a “standard” lens, mimicking human-eye perspective. A high number like 200mm is a telephoto, bringing distant subjects like wildlife or sports closer. A single number (e.g., 35mm) indicates a prime lens; a range (e.g., 24-70mm) indicates a zoom lens.
The aperture, written as f/ followed by a number (f-stop), is equally critical. A lower f-number like f/1.8 means a wider maximum aperture. This has two major effects: it allows more light for shooting in dim conditions without a flash, and it creates a shallower depth of field, blurring the background for beautiful subject isolation. A lens with a variable aperture (e.g., f/3.5-5.6) gets “slower” (lets in less light) as you zoom in.
Look beyond these basics. Optical Image Stabilization (OIS/IS/VR) helps prevent camera shake for sharper handheld shots, a lifesaver in low light or at long focal lengths. Weather sealing involves gaskets that protect against dust and moisture, vital for outdoor photographers. Build quality, often indicated by metal versus plastic construction, affects durability and handling.
Finally, the lens mount is non-negotiable for compatibility. A Canon EF lens won’t fit a Sony E-mount camera without a complex adapter. Stick to your camera system’s native mount for guaranteed autofocus and electronic communication.
Glossary Quick Reference:
- Prime Lens: Fixed focal length; often sharper and faster (wider aperture).
- Zoom Lens: Variable focal length; offers versatility.
- Aperture: The size of the lens opening; controls light intake and depth of field.
- Depth of Field: The zone of acceptable sharpness in front of and behind your focus point.
- Image Stabilization: Technology that counteracts camera shake.
The Prime vs Zoom Dilemma Solved
Now that you’ve decoded the specs, you face the fundamental gear choice: prime or zoom? This isn’t about one being universally better, but about which tool unlocks the images you want to make, without draining your wallet.
Prime lenses have a fixed focal length, like a 35mm or 50mm. This limitation is their superpower. With fewer moving internal elements, they are often sharper and can achieve wider maximum apertures (like f/1.8 or f/1.4) for the same cost as a zoom. That wide aperture creates beautiful background blur (bokeh) and gathers more light, making primes kings of portrait photography and low-light situations where you can’t or won’t use a flash. They’re typically smaller, lighter, and force you to move your feet to compose, which many photographers find creatively engaging.
Zoom lenses, like a 24-70mm, offer incredible versatility by covering a range of focal lengths in one barrel. This makes them indispensable for dynamic situations where changing lenses means missing the shot. They are the pragmatic choice for travel photography (minimizing gear weight), events (like weddings where you quickly switch from wide group shots to tight ceremonies), and wildlife where you can’t physically get closer. While premium “fast” zooms with wide constant apertures exist, they are large and expensive.
Cost is a major differentiator. A new 50mm f/1.8 prime is famously affordable, offering pro-level optical quality for a fraction of a pro zoom’s price. You can build a collection of two or three sharp primes for the cost of one high-end zoom. The value proposition is clear: primes offer superior optical performance per dollar, while zooms offer operational flexibility.
The smart, budget-conscious strategy endorsed by seasoned photographers is to build a hybrid kit. Start with a versatile, standard zoom (like an 18-55mm or 24-120mm) as your workhorse. Then, add a fast prime (like a 35mm or 50mm) for low light and creative control. This balanced approach gives you flexibility for most situations and a specialized tool for when image quality is paramount, all without overcommitting your budget upfront.
Navigating the Used Lens Market Safely
Once you’ve decided between a prime’s brilliant aperture or a zoom’s flexible range, the next frontier for the budget-conscious is the used market. This is where Reddit’s collective experience truly shines, offering a roadmap to incredible value if you navigate it carefully. The key is shifting your mindset from a simple purchase to a verified transaction.
Your primary sources are online marketplaces like eBay, dedicated photography forums (FredMiranda, Photrio), and local camera stores. Each has distinct pros and cons. Reputable forums often have established feedback systems and knowledgeable sellers, but selection can be limited. Local stores offer the chance to inspect in person and may provide a short warranty, but prices might be higher. Large marketplaces offer the widest selection and buyer protection programs, but require the most diligence to filter out bad actors.
Before you even message a seller, know what to look for. Always request high-resolution, original photos of the lens elements against a bright light to check for fungus, haze, or significant dust. Ask for photos of the mount for wear and the barrel for dents. Key questions to ask: “Why are you selling?”, “Any scratches, fungus, or issues with autofocus/manual focus?”, “Does it include original caps, hood, and packaging?” The box and serial number can help verify authenticity against manufacturer records.
When you get the lens in hand, have a rigorous testing checklist. Mount it and test autofocus speed and accuracy across different distances. Manually focus through the entire range to ensure smooth operation. Check the aperture blades by stopping down and looking for oil or sluggish movement. Finally, take test shots of a detailed subject at various apertures and review them at 100% zoom for sharpness and any decentering issues.
Negotiate politely with facts; mention any minor flaws you’ve noticed or comparable recent sales. Understand that used gear typically has no manufacturer warranty, though some retailers offer their own. Always use payment methods with buyer protection, and never gift money for “friends and family” payments to strangers. This cautious approach unlocks the used market’s potential, letting you acquire the lenses you identified in the previous chapter without the retail price tag, freeing up budget for your next strategic purchase.
Timing Your Purchase for Maximum Savings
After mastering the used market, the next level of savings comes from strategic timing on new and refurbished gear. The photography industry follows predictable cycles, and aligning your purchase with them can save hundreds. New lens models typically launch in the first half of the year, often around major trade shows. When a new version is announced, retailers aggressively discount the outgoing model to clear inventory. This is a golden window to buy proven, high-quality optics at a significant discount, as the performance leap between generations is often incremental.
Seasonal sales are your most reliable allies. Major holiday weekends like Black Friday, Cyber Monday, and post-Christmas sales see across-the-board discounts and bundled incentives. Similarly, end-of-financial-year clearances (often June-July) are prime times. Manufacturers also run limited-time rebate programs, usually in spring and fall, offering direct cash-back on specific lens lines. Signing up for newsletters from manufacturers and authorized dealers is crucial to catch these announcements.
Never overlook manufacturer-refurbished units. These are lenses returned, repaired, tested, and certified by the original maker (like Canon, Nikon, or Sony) and sold with a warranty, often at 20-40% off new prices. They represent exceptional value, as they meet original specifications. Authorized dealers sell these during special sales, further reducing cost.
Patience is rewarded with tools. Use price tracking websites and browser extensions to set alerts for your desired lens. These tools show historical price charts, revealing the true “low” and letting you know if a current “sale” is genuine. This data informs a critical decision: buy now or wait. If your lens is for an imminent, crucial project, buy it. If it’s for general use or a future endeavor, set your target price and wait for the alert. This disciplined approach prevents impulse buys and ensures your budget stretches to the next smart category: exploring exceptional third-party lenses.
Alternative Brands and Third-Party Options
Once you’ve timed your purchase perfectly, the next decision is what to buy. Stepping beyond the camera manufacturer’s own offerings opens a world of value. Third-party lens makers like Sigma, Tamron, and Tokina have evolved from producing budget alternatives to creating optics that often rival or even surpass original equipment manufacturer (OEM) lenses in specific areas, all while offering significant cost savings.
The value proposition is straightforward: for typically 30-50% less than an equivalent OEM lens, you get exceptional optical performance. Modern third-party lenses, particularly Sigma’s Art series or Tamron’s SP/Di series, are renowned for sharpness and build quality. The trade-offs, when they exist, are often in areas like autofocus speed (though the gap has narrowed dramatically) or more specialized coatings that might affect flare resistance. Crucially, you must research compatibility. While lenses are made for specific mounts (Canon RF, Sony E, Nikon Z), ensure the model supports all camera functions. A potential issue is firmware; third-party brands may lag behind in updating lenses for new camera bodies, though this is less common now.
For stellar value, consider these community favorites:
- Sigma 18-50mm f/2.8 DC DN Contemporary: A compact, constant-aperture zoom for APS-C mirrorless that outperforms many kit lenses.
- Tamron 70-180mm f/2.8 Di III VXD: A lighter, more affordable alternative to the 70-200mm f/2.8 workhorse, with superb optics.
- Tokina opera 16-28mm f/2.8 FF: A robust, wide-angle zoom for full-frame that offers pro-level specs at a fraction of the cost.
To research effectively, don’t just look at overall scores. Read detailed reviews that test sharpness at different apertures, autofocus consistency, and build quality over time. YouTube video reviews showing real-world performance are invaluable. This strategic approach to brand selection, combined with smart timing, allows you to allocate your budget toward building a more capable collection, which we’ll plan out next.
Building Your Ideal Lens Collection Over Time
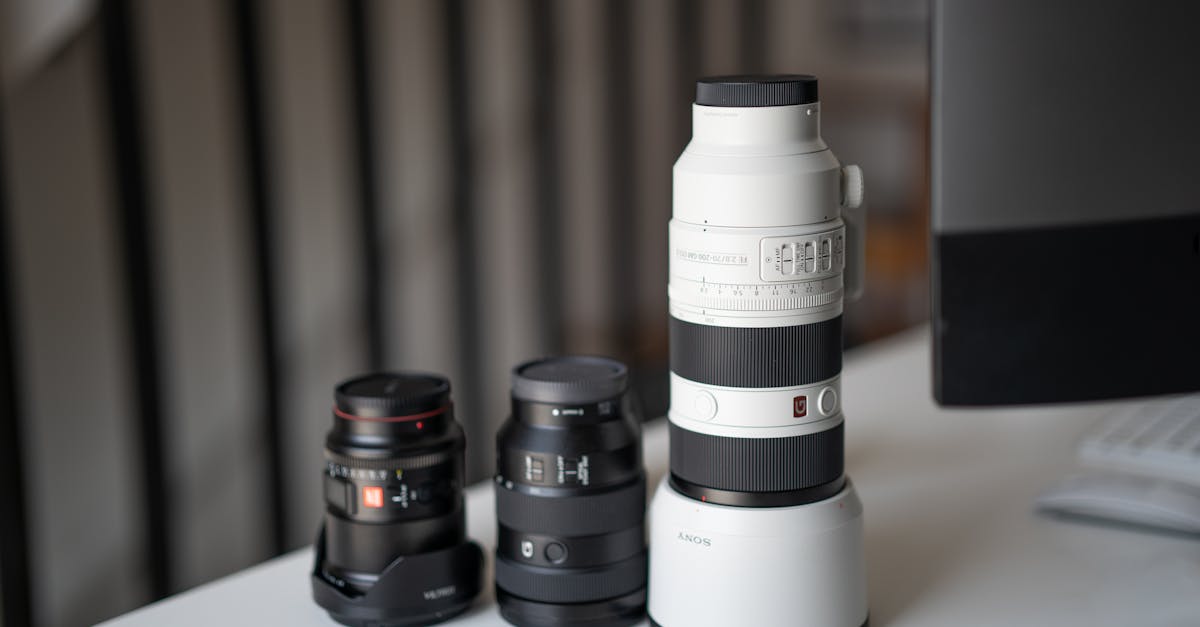
Building a complete lens collection is a marathon, not a sprint. The key is to adopt a strategic, phased approach that aligns with your growth as a photographer, avoiding the financial strain of buying everything at once. A common professional benchmark is the “holy trinity”: a wide-angle zoom (like 16-35mm), a standard zoom (24-70mm), and a telephoto zoom (70-200mm). This trio covers nearly every scenario, but buying them all immediately is unnecessary and expensive.
Your first purchase should be dictated by your dominant photography style. A landscape or architecture enthusiast should prioritize a wide-angle lens. A portrait or street photographer might start with a fast prime lens, like a 50mm f/1.8, which is affordable and teaches valuable composition skills. A wildlife or sports shooter needs to begin with a telephoto. This focused start ensures your initial investment is immediately useful. After mastering your first lens, you can identify the specific gaps in your kit—do you need wider, closer, or faster?—and plan your next purchase accordingly.
To make this financially sustainable, treat your lens fund as a dedicated savings line in your budget. Spread purchases over years, targeting major sales events. Crucially, be willing to sell gear you no longer use. Well-maintained lenses from major brands, including the third-party options discussed earlier, retain value remarkably well. Selling a lens after a year or two of use can often fund 60-80% of your next upgrade, effectively making your collection a rotating, interest-free loan.
Remember to budget for essential accessories. A quality lens hood protects the front element and improves contrast. A simple UV or clear filter is cheap insurance for your investment. A proper camera bag with padded dividers is non-negotiable for transport. Allocate 10-15% of your lens budget for these items.
Consider this sample roadmap: A beginner might start with a kit zoom, then add a 50mm f/1.8 prime, followed by a third-party telephoto zoom. An enthusiast could replace their kit lens with a premium standard zoom (like a Sigma 24-70mm), then add a wide-angle, and finally a telephoto. A professional builds the core trinity first, then fills specialized gaps with tilt-shift, macro, or super-telephoto lenses. The journey is personal, but the principle is universal: buy intentionally, master what you have, and let your evolving skills—not marketing—guide your next move.